
The 3D Flexagon
Overview
These instructions show how to make a 3D flexagon fidget toy, inspired by Martin Gardner’s well-known hexaflexagons, which he first explored in his Mathematical Games column in the December 1956 issue of Scientific American. The design of this object is not mine. However, the approach may be new, since it is intended to be very accessible by using everyday household materials.
What You Need
- 12 standard paper clips (either #1 or Jumbo will work)
- 1 small hollow plastic straw (cocktail straw or coffee stirrer)
- Diagonal cutting pliers to cut wire
- Scissors or exacto knife to cut straw
- Ruler with metric scale in mm
- Needle nose pliers for bending (optional)
- Bending jig (optional, see below)
Note for G4G16 kits
If you are building from the kit provided in the Gathering for Gardner 16 (G4G16) gift exchange, you should already have necessary wires and straw segments pre-measured and pre-cut, so you can skip steps 1 and 2 below. These kits also have unbent paper clips and a full straw for you to make a second 3D flexagon!
Note on Bending Jigs
It is easiest to bend the wire with a simple jig.
- Option 1: 3D printed jig If you have access to a 3D printer, here is a link to an STL file that may help with bending. It is a simple wedge with a 22 mm square side, and both a 60° and 90° angle. It also has a small groove for holding the wire along the faces.
- Option 2: 22 mm wide piece of wood If you have access to a table saw and are comfortable with making precise cuts, cut a small board which is 22 mm wide. You can use this for bending the ends of the wires.
Assembly Notes
Here is a photo of the finished assembly.
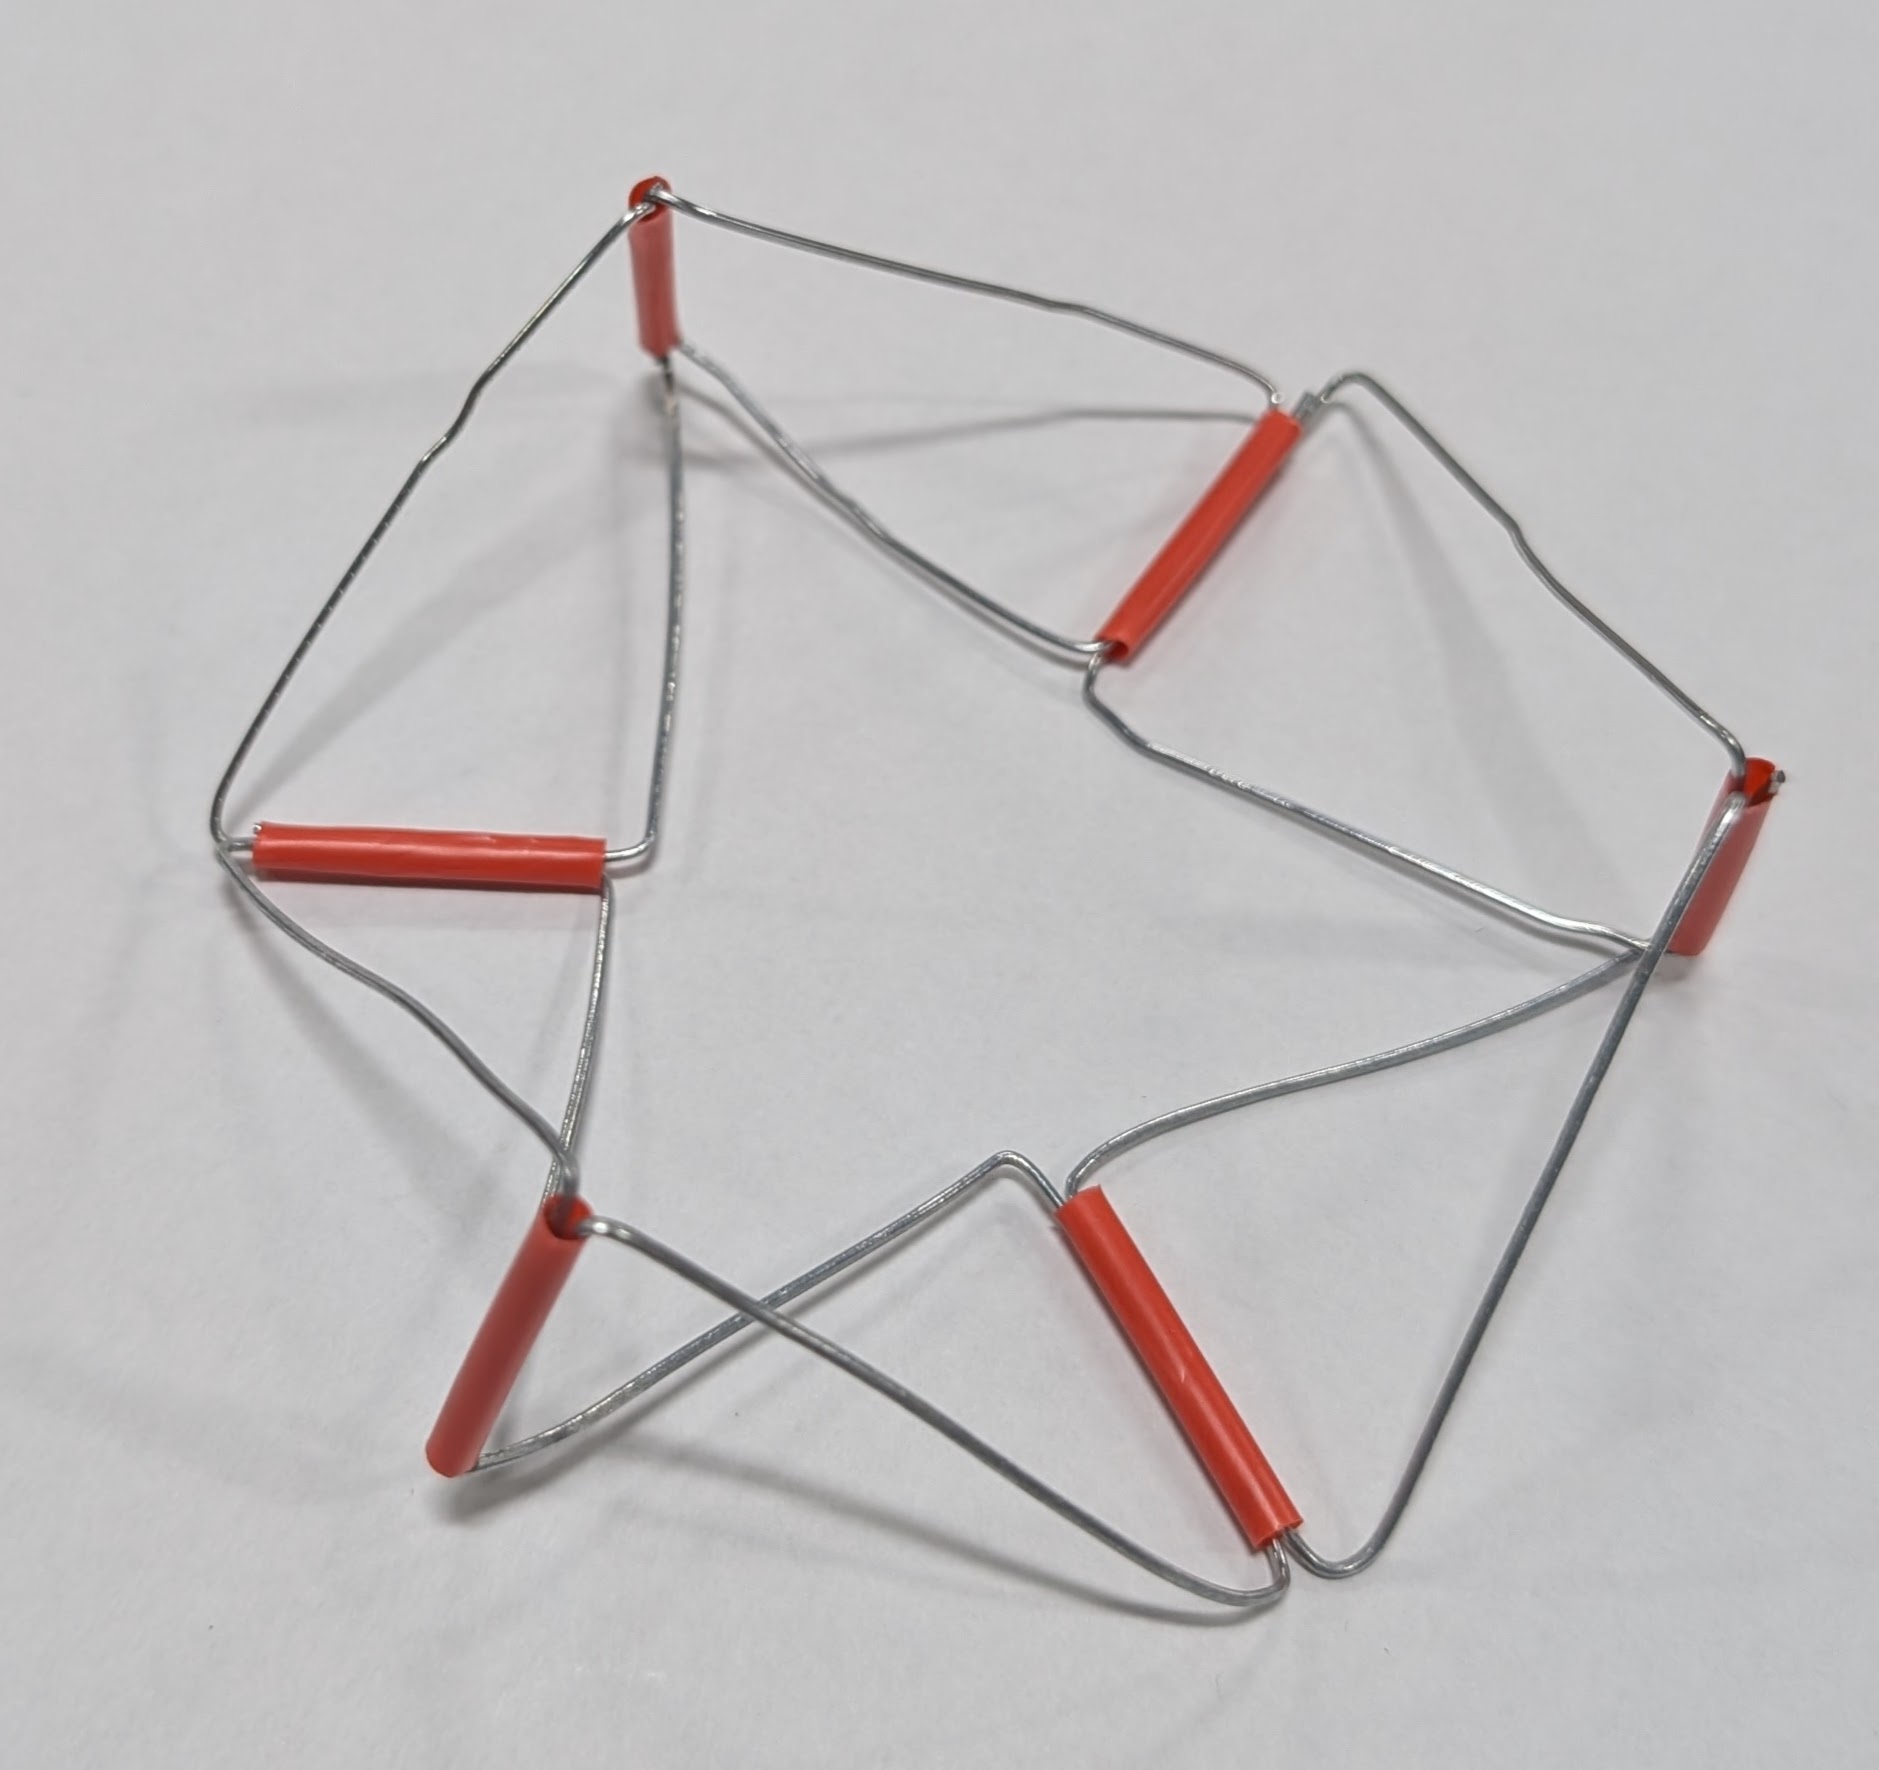
- Note 1: There are four wires going into each straw, two from each direction.
- Note 2: In this orientation, the wires with right angles (see figure 2) end up making a large equilateral triangle where each side has two wire segments that are “horizontal” with straws pointing outward. The wires with ~60° angles connect the “vertical” straws to the “horizontal” straws in an “up and down” pattern.
3D Flexagon Construction
Step 1: Cut the wires
Unbend the paper clips to create 12 wires that are more or less straight. Cut 6 of these wires to length 95 mm and 6 of them to length 85 mm.
Step 2: Cut the straw
Cut the straw into 22mm segments. You will need 6 of them.
Step 3: Bending the 85 mm segments
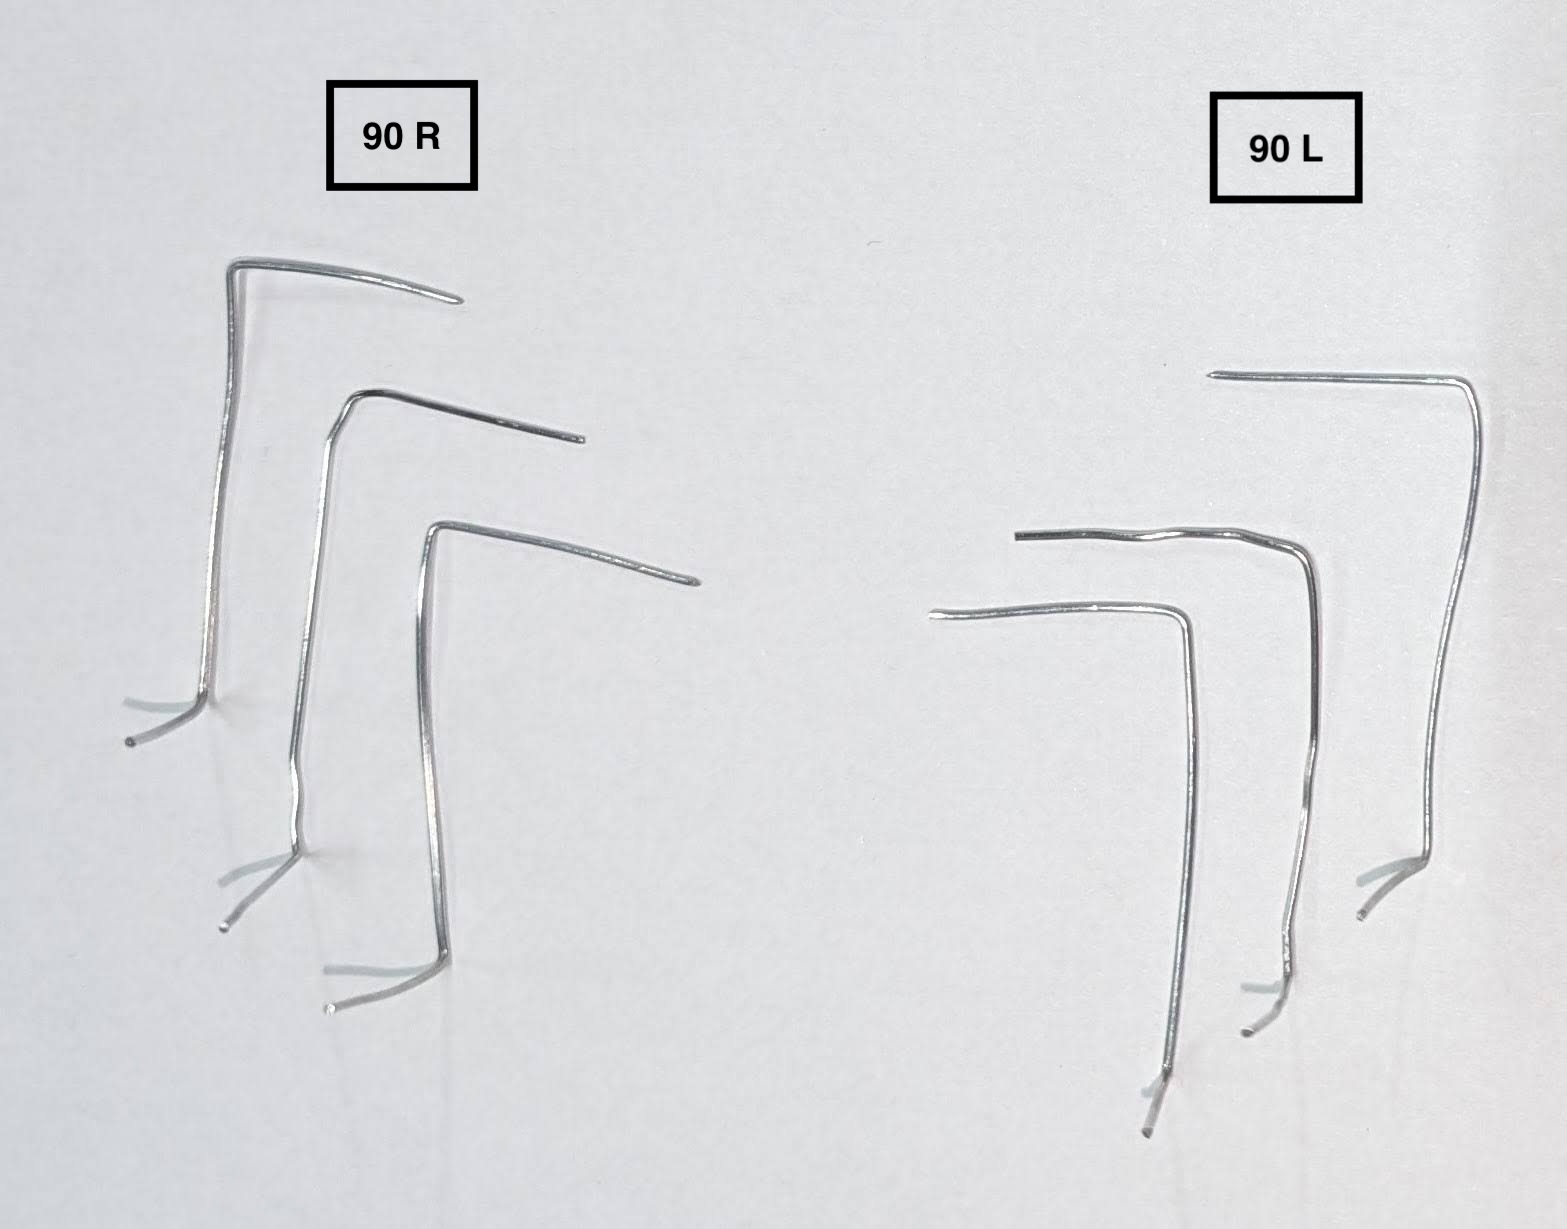
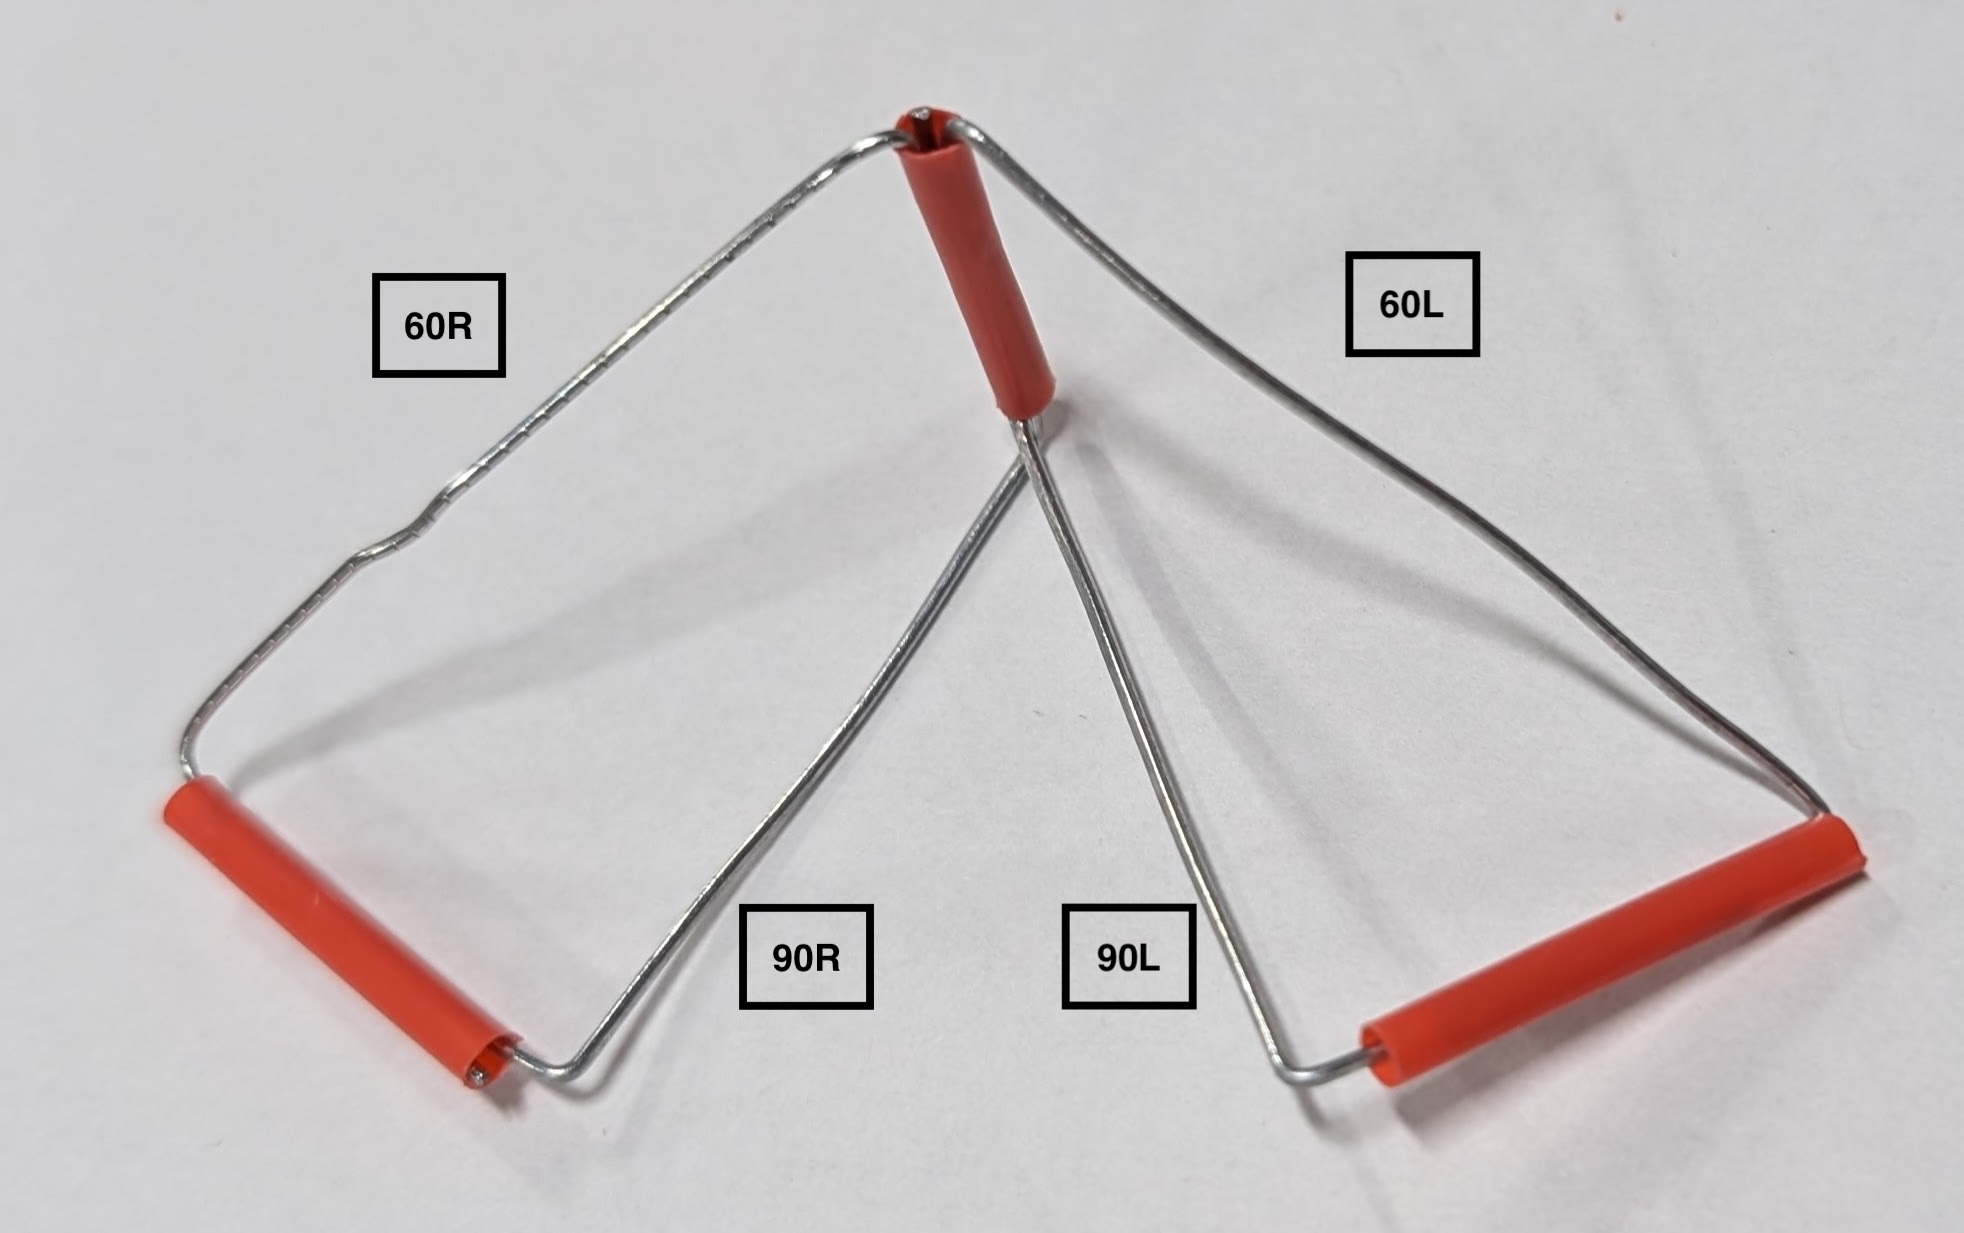
Start by bending a 90° angle in the 85 mm wires, with 22mm on side of the angle. On the other end of the same wire, bend another 90° angle which is in a different plane. Do this two more times for a total 3 wires. Repeat the process for the other three 85 mm wires, but this time bend the 90° angle in the opposite direction (e.g. down instead of up). You should end up with 6 zigzag wires, which we call 90R and 90L as shown in figure 2.
Step 4: Bending the 95 mm segments
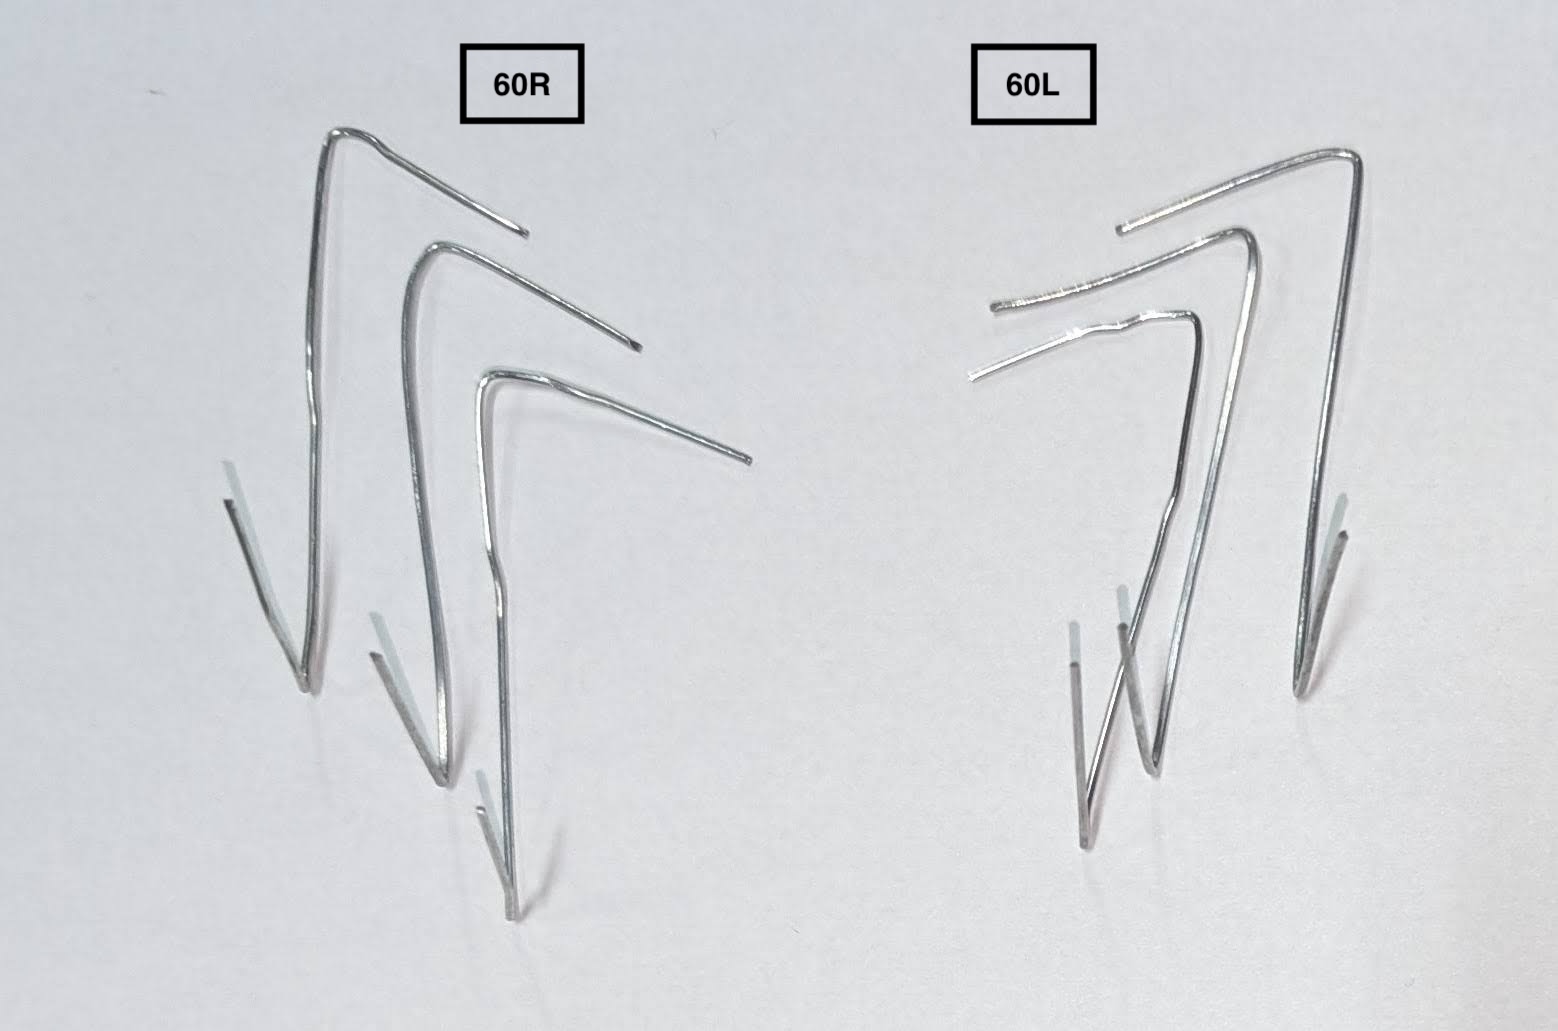
Repeat step 3 with the 95 mm wires. Once the 95 mm wires have been bent at 90° angles, continue bending to decrease each angle to 60° as show in Figure 3. We will call these 6 zigzag wires 60L and 60R.
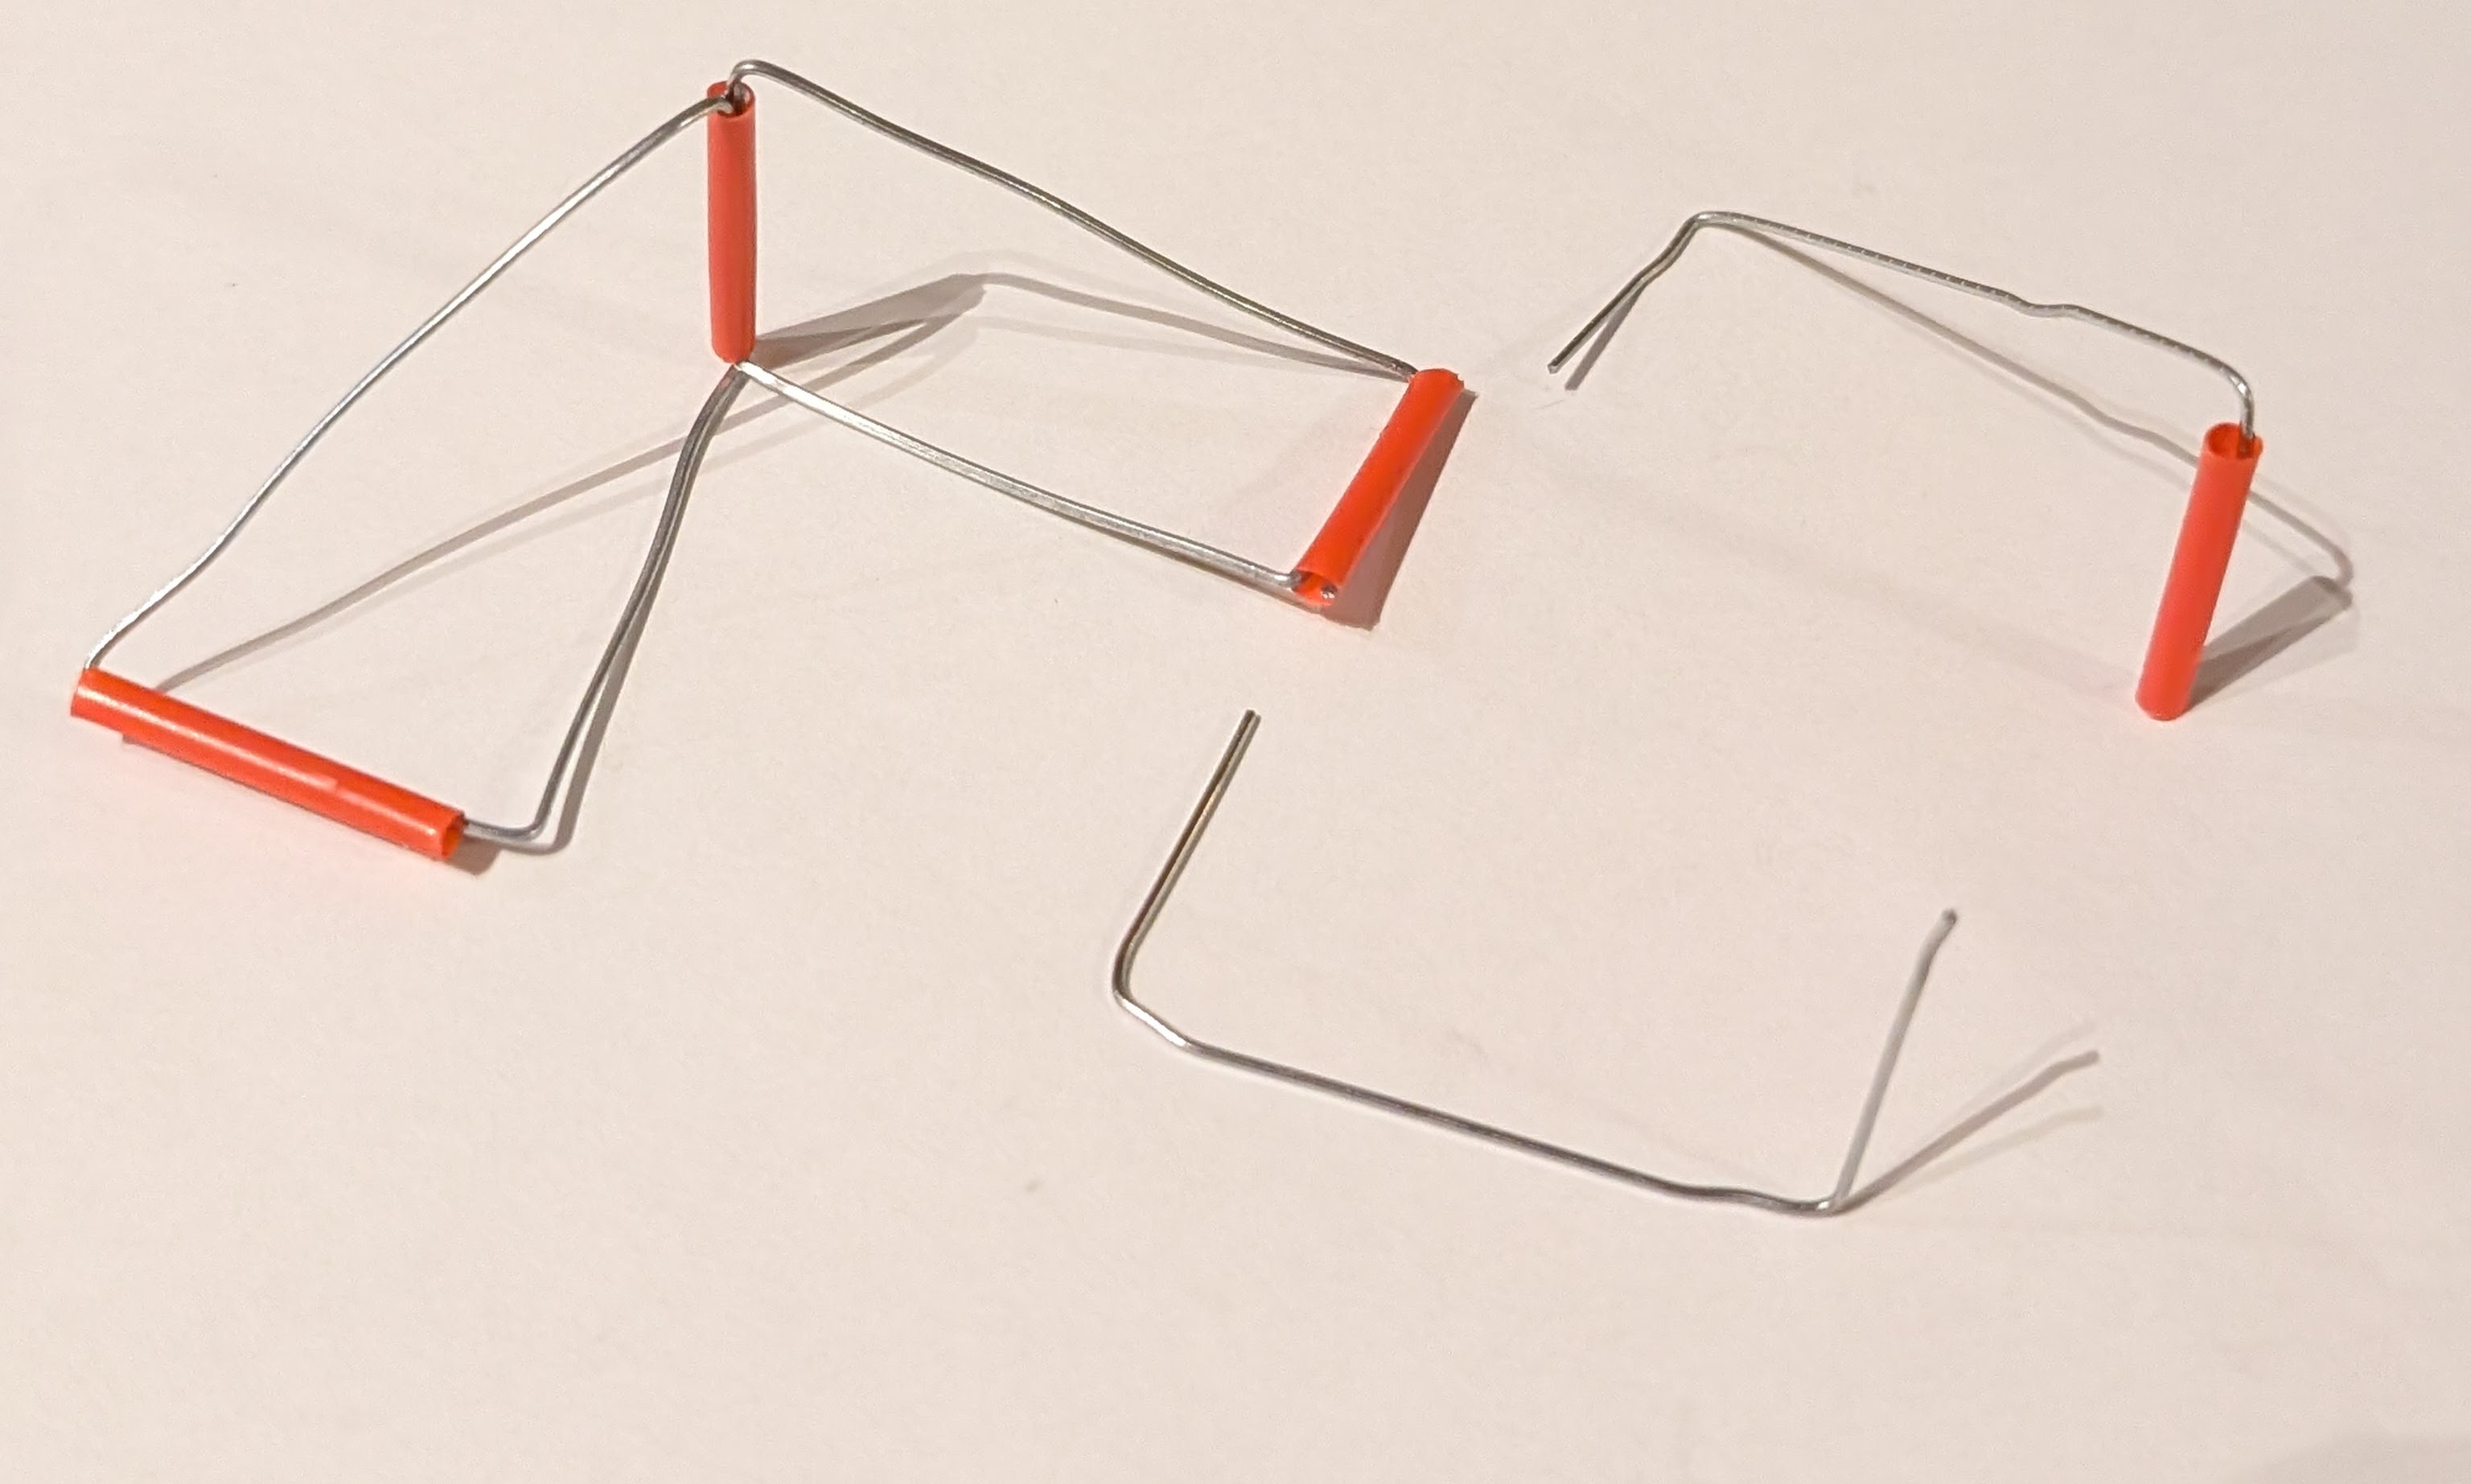
Note that the there is a temptation, when making the two 90° bends in different planes, to start with both 90° bends in the same plane and then twist one of them orthogonally out of the plane. Unfortunately, this twisting can significantly weaken or even break the thin 20-gauge wires that we are using. Instead, we suggest bending the first 90° bend with a 22 mm side and then rotate the wire to bend the second 22 mm side on the other end in an orthogonal plane.
Step 5: Assembly
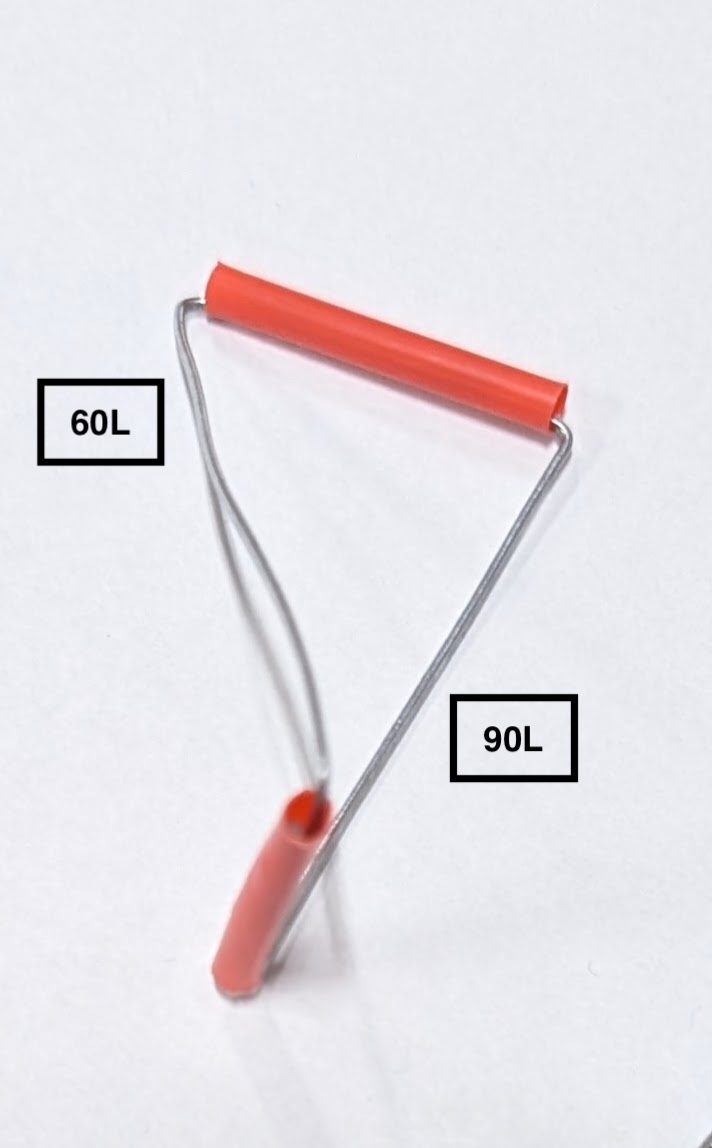
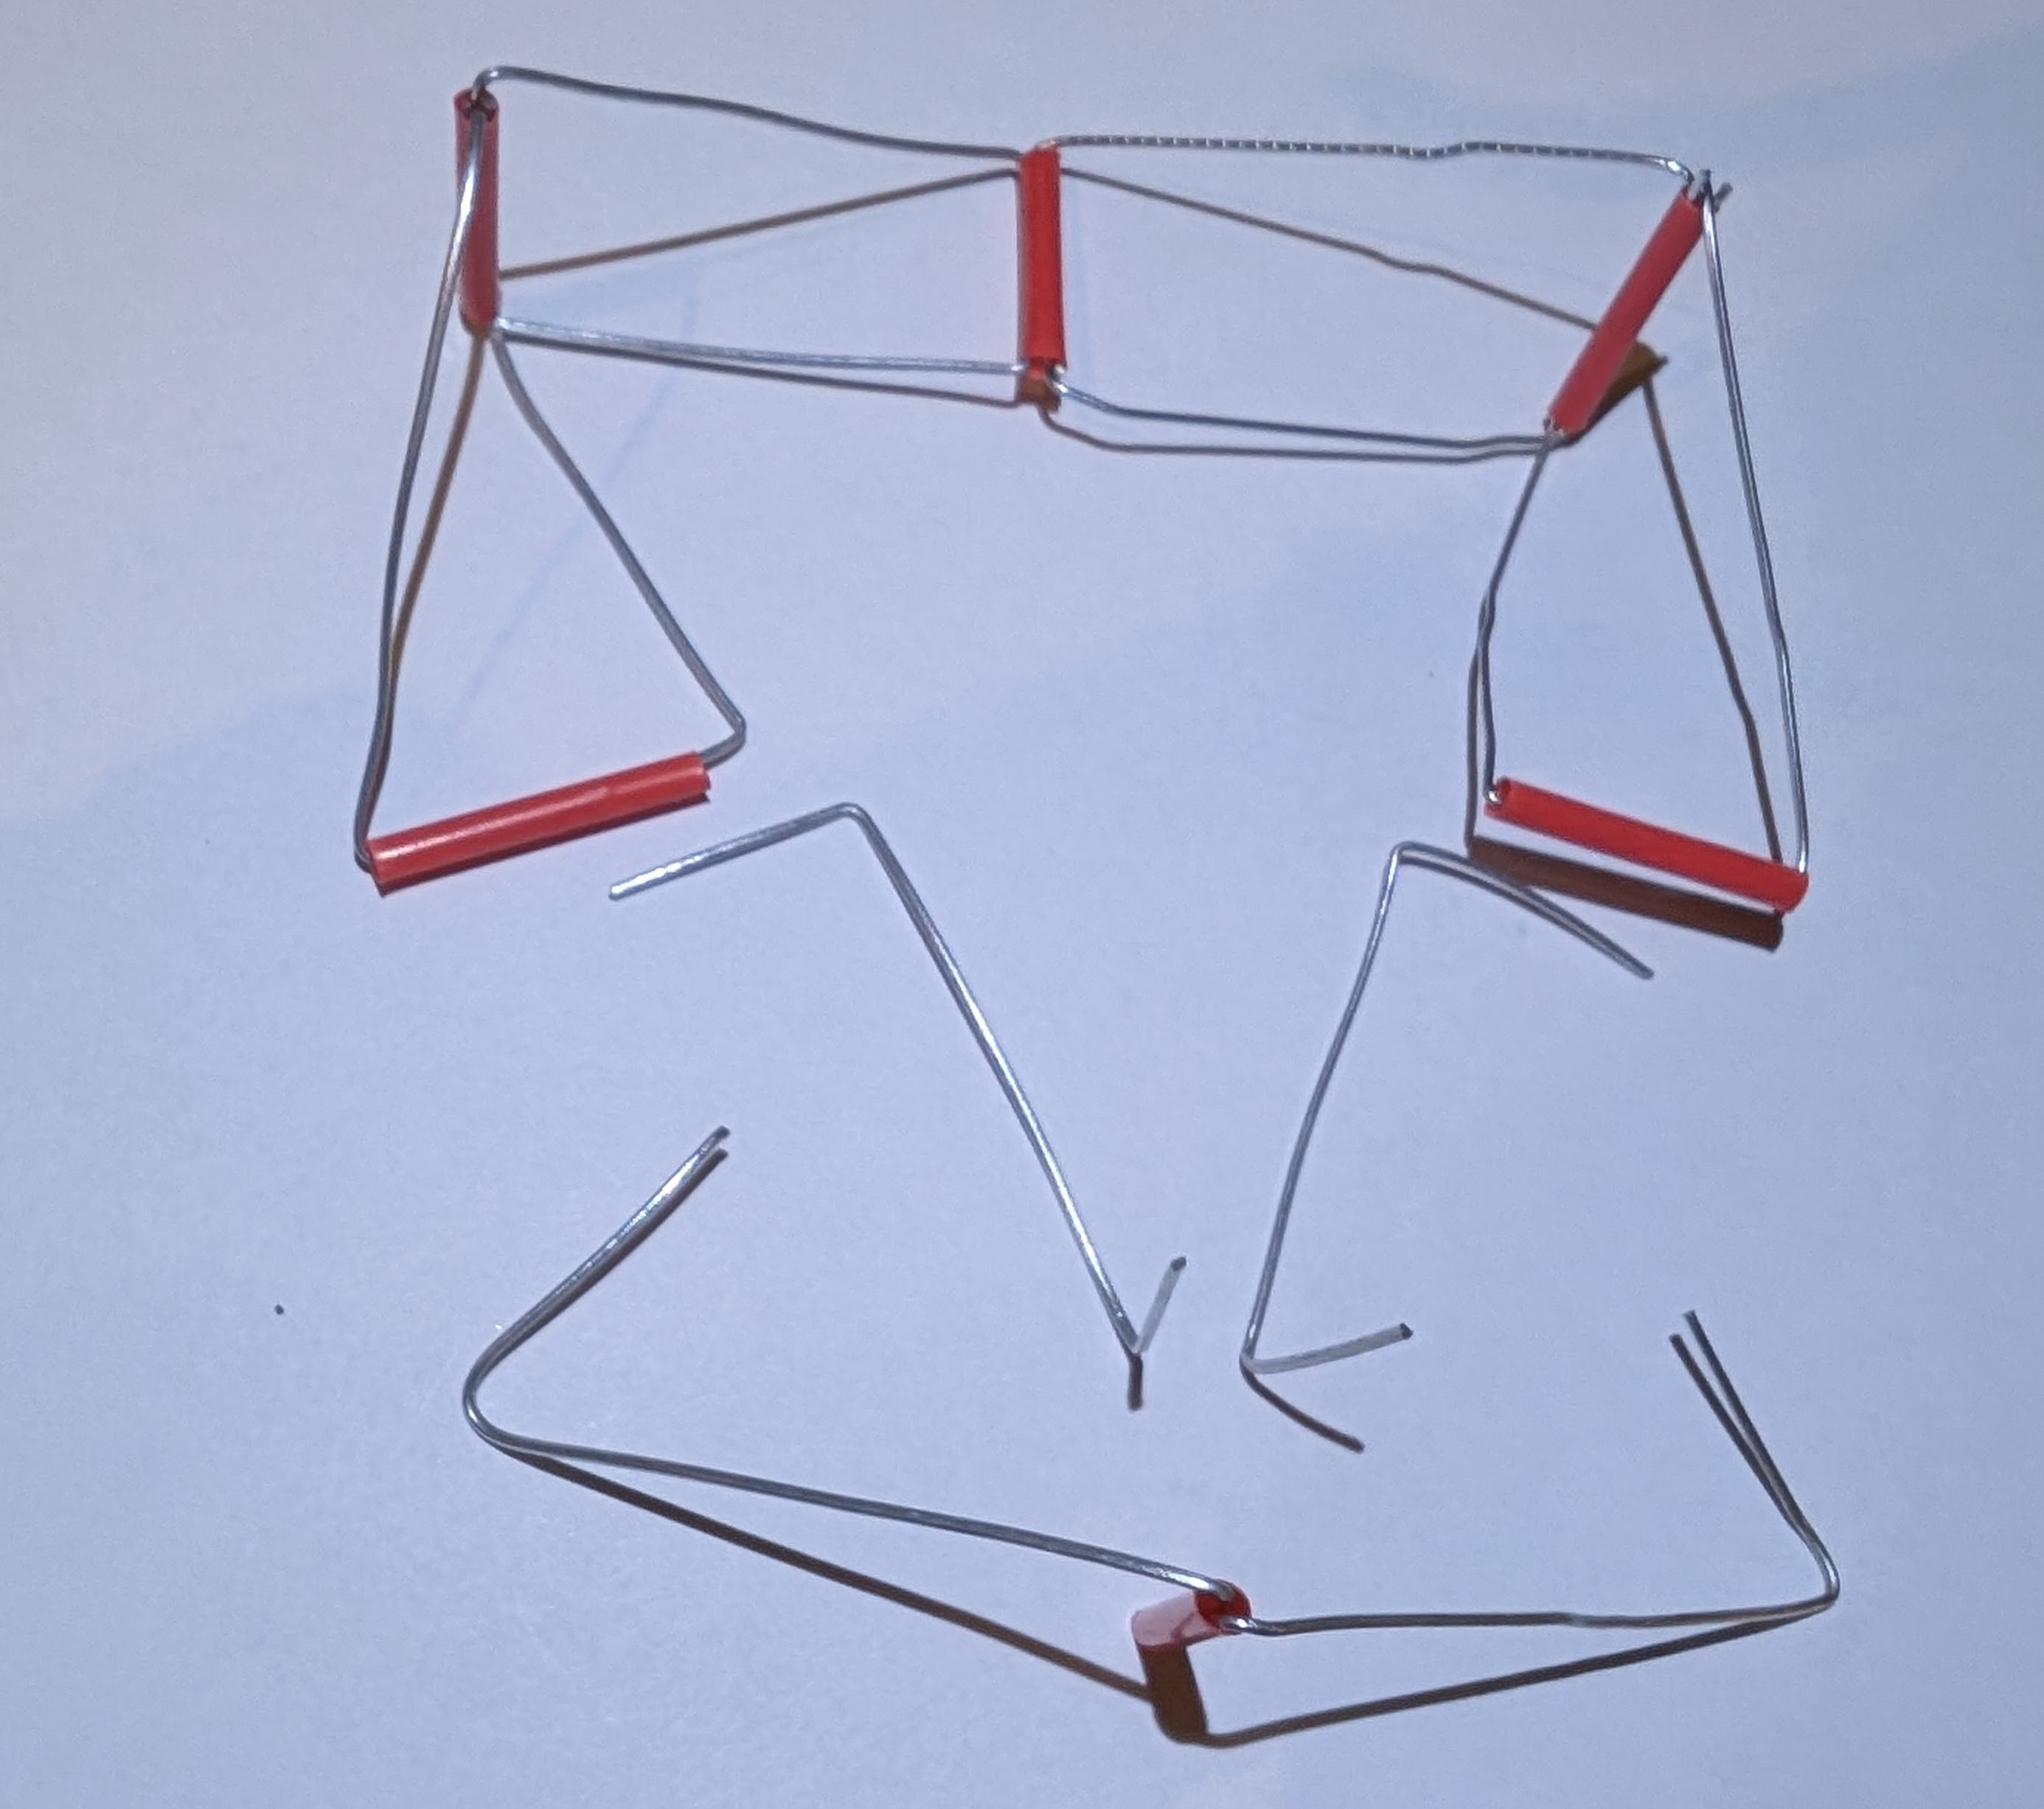
For clarity, lay out each wire segment on a sheet of paper, and label areas on the paper to make it easier to identify the different wires. Start with a 60L and 90L wire and two tubes to make a basic shape, as shown in Figure 4. Note that, in this orientation, there is a “vertical” straw and a “horizontal” straw.
Add a 60R segment and a 90R segment with a third tube to create a basic double shape, as shown in Figure 5.
Now continue the pattern by adding a 90R and 60R wire to the 90L and 60L side of the basic double shape, see Figure 6. This introduces a second “vertical” straw.
Continuing the pattern, add a 90L and 60L wire, see Figure 7. You should now see one side of the large triangle mentioned in note 2 above in the center segments.


Almost done! Take the remaining tube and the remaining 60L and 60R wires and connect them to each other with the final “vertical” tube as shown in Figure 8. Then complete the flexagon with the two remaining 90L and 90R wires, making sure each tube has four wires in it, with two entering from either end, as shown in Figure 8. The finished 3D Flexagon is shown in Figure 1.
Step 6. Flexing!
When the flexagon is fully assembled, it’s time to flex! Flex by repeatedly pulling horizontal segments into a vertical position. How many distinct configurations can you see?
Depending on how the wire was cut and bent, the Flexagon may need be adjusted by making small bends in the wire to loosen or tighten angles. You may also remove and trim the ends of the wire if necessary.
Here’s a video showing how to flex this 3D flexagon